After being frustrated with the power strip and USB cubes on the floor next to where I sit to watch TV and movies, I've decided to do something about it. I have modified my end table that sits between my wife and I with two power receptacles with USB plug power adapter built in. Cost about $75. Not cheap, but very very handy. It's all about the convenience my friend.
Here's how:
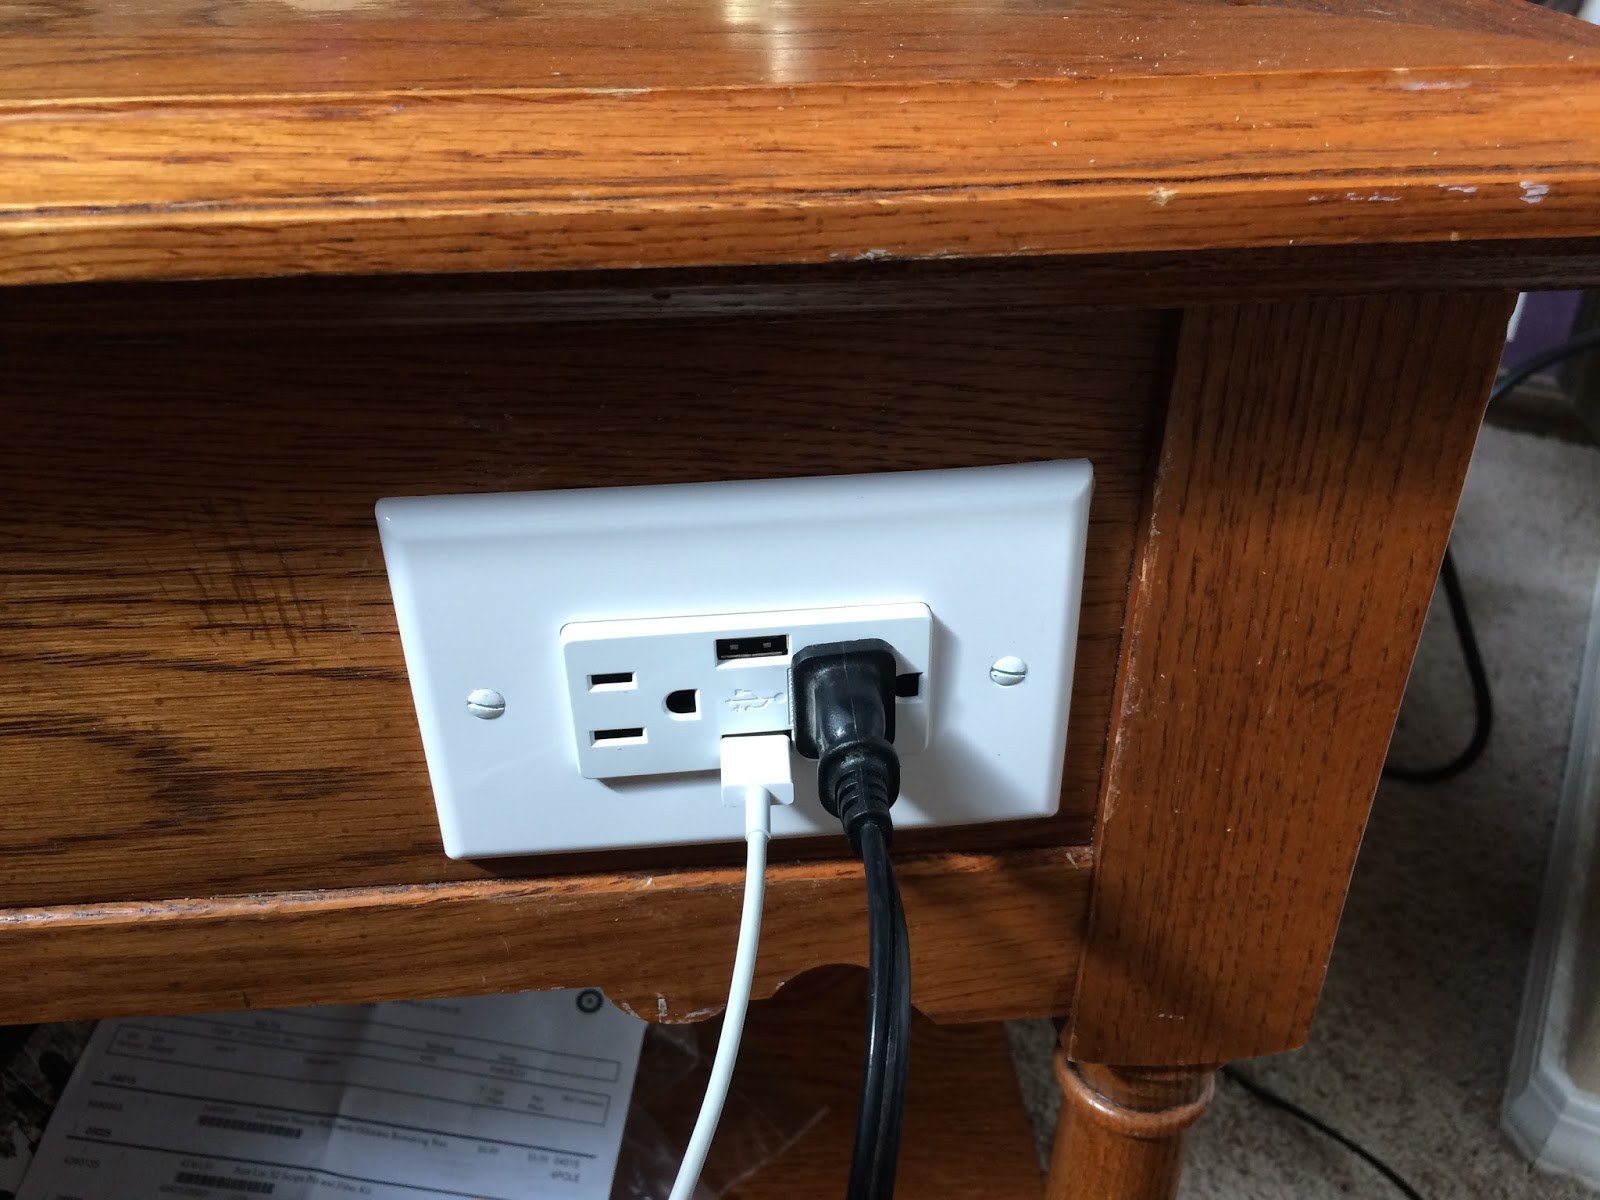
I went down to Home Depot and purchased two Leviton Decora 15 Amp Combination Duplex Receptacles with USB Charger build in, 2 remodel outlet boxes, a 9' replacement power tool cord and installed it into my end table. Sound simple... and it was. This mod took me about 90 minutes with cleanup.
The tools I used are pictured below. Sorry, I forgot the tape measure in the picture. Here we have a drill for the pilot holes. One for the scroll saw to start and the other to pilot small hold for the screw I needed to hold down the wires. A standard and Phillips screwdriver, wire cutters, wire stripper, and of course safety glasses.

First make sure you have room for the outlet boxes by checking if you have room behind the drawer when it is fully closed. I happen to have a lot of room. My thought is to have one outlet installed on each sides of the end table.
I started by using the blue box to mark where I wanted it to be by tracing around it. Don't get too close tot he edges or decorative trim pieces. Make sure you have room on the back side of the table away from screws or other parts of the table also. Also make sure your outlet cover will fit perfectly over the outlet where you have marked it. You don't want to have to cut a outlet cover because you got it too close to the edge or trim piece.
After marking where I want the hole cut, I drilled a 3/8" hole inside where the box would go so my scroll saw bit would have a starting location. I cut the 2 sides out and installed the boxes by tightening the mounting screws until snug, but not overly tight. It's plastic so don't crank down too hard, just enough so the box doesn't move.


I used remodel style of outlet box because it has 2 "ears" that fan out and tighten against the back side of the table. Once the remodel style outlet box was installed, I took a new 9 foot 3 wire 14 gauge power tool replacement cord and connected the new outlets. (14/3)


This picture shows the side with the 2 wires connected. One wire going to the other outlet and the other to the wall outlet. With both sides wired and then secured in the boxes, I added some protection to the extension cord from being kicked out by mistake. Taking a wide flat washer (fender washer) and bending it so it is half round I can use one screw to hold down the wires to the inside of the table. Now if someone happens to kick the cord while walking behind it (no idea why some one would go back there) the washer is holding the wire tight against the table and won't rip it out of the receptacle itself.
Please make sure you wire the outlet correctly with the black (hot) wire going to the gold screw and the white (neutral) wire going to the silver screw and the green (ground) wire going to the green screw. This makes sure the outlet will have the correct polarity.

This simple tester you can get from most home improvement stores for about $7. You can use it to test the polarity of the outlet. First check your wall outlet to make sure it was installed correctly, then test your new end table modification outlet. If the 2 amber lights are on, you wired it correctly. If not, swap the black and white wires. Green wire ALWAYS goes to the ground screw (which is green).
And the final result is this. I can now sit in my recliner and plug in my iPhone or computer or whatever I want, as can my wife on her side. All's well that ends well.